
WooCommerce Plugin
Secure. Fast. Seamless Payments for Your Online Store
The Jio Payments WooCommerce Plugin enables merchants to easily accept Cards, NetBanking, UPI QR, UPI Intent, and UPI VPA directly on their WooCommerce store.
This plugin is designed to provide a frictionless onboarding experience and a powerful checkout experience with minimal setup, without waiting for marketplace approval or external verification.
In Phase 1, the plugin will be available only through JPSL’s official website or via direct distribution from our Business Team. It will not be published on the WordPress or WooCommerce marketplace.
Onboarding & Credential Sharing
Once the merchant completes the onboarding process with JPSL:
Merchant Receives
- MID (Merchant ID)
- API Key / Client ID
- API Secret
- Webhook URL (if required)
- Environment Mode (Test / Live)
These credentials are required to activate the payment gateway on the merchant’s WooCommerce store.
How the merchant receives them:
Credentials are securely shared by the JPSL Business Team via email or dashboard, after onboarding is approved.
Merchant Admin Access to WordPress
To install the plugin, merchants must log in using their WordPress Admin credentials, usually provided by:
- Their website developer / agency
- Hosting provider (GoDaddy, Hostinger, Bluehost, etc.)
- Or self-created credentials (for self-built sites)
Installing the Plugin in WordPress (Step-by-Step)
Step 1 — Log in to WordPress Admin
Step 2 — Navigate to Plugin Upload
Go to:
Plugins → Add Plugin → Upload Plugin
Screen Description:
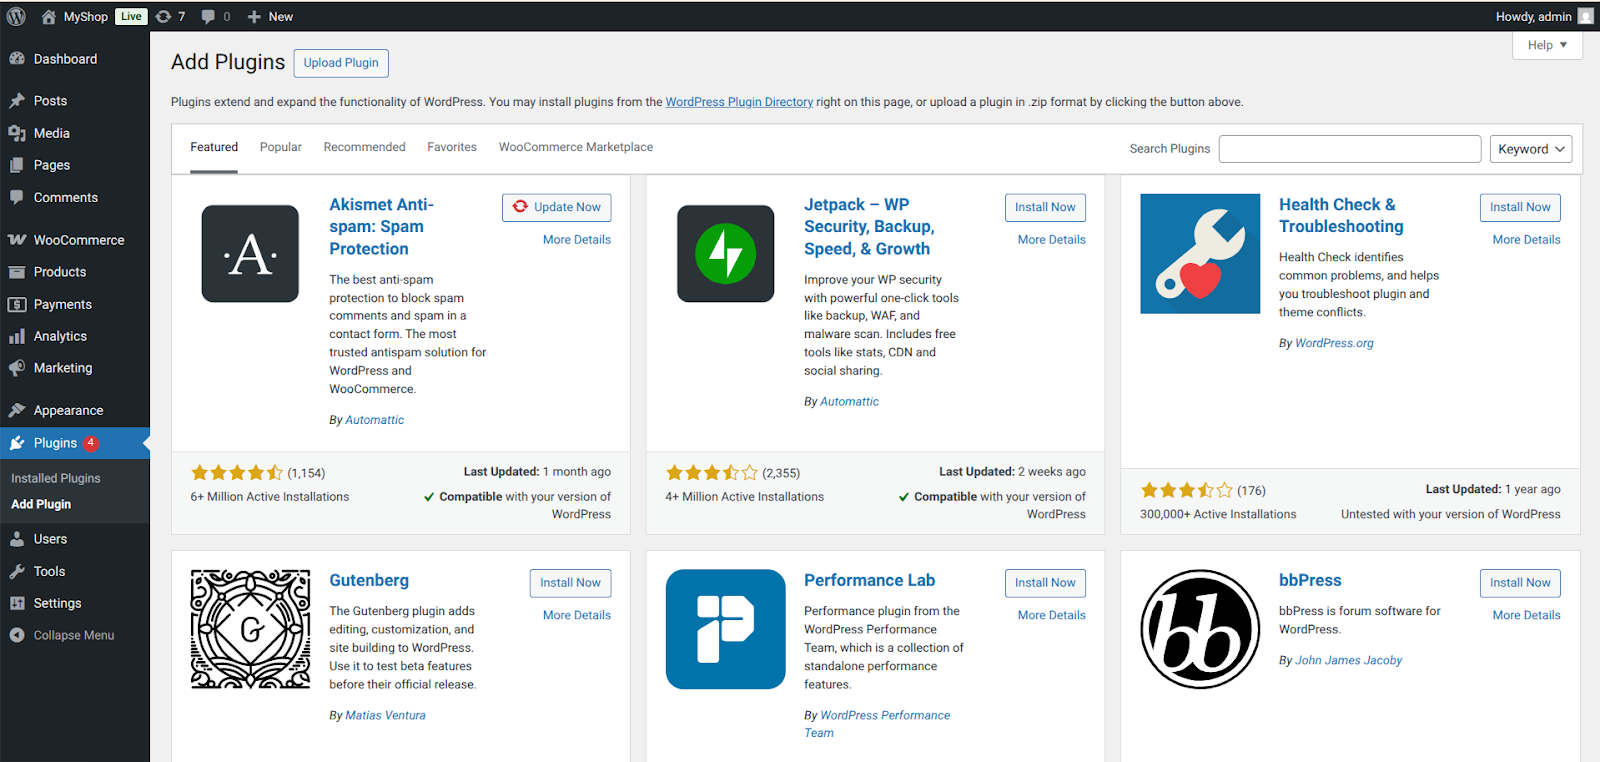
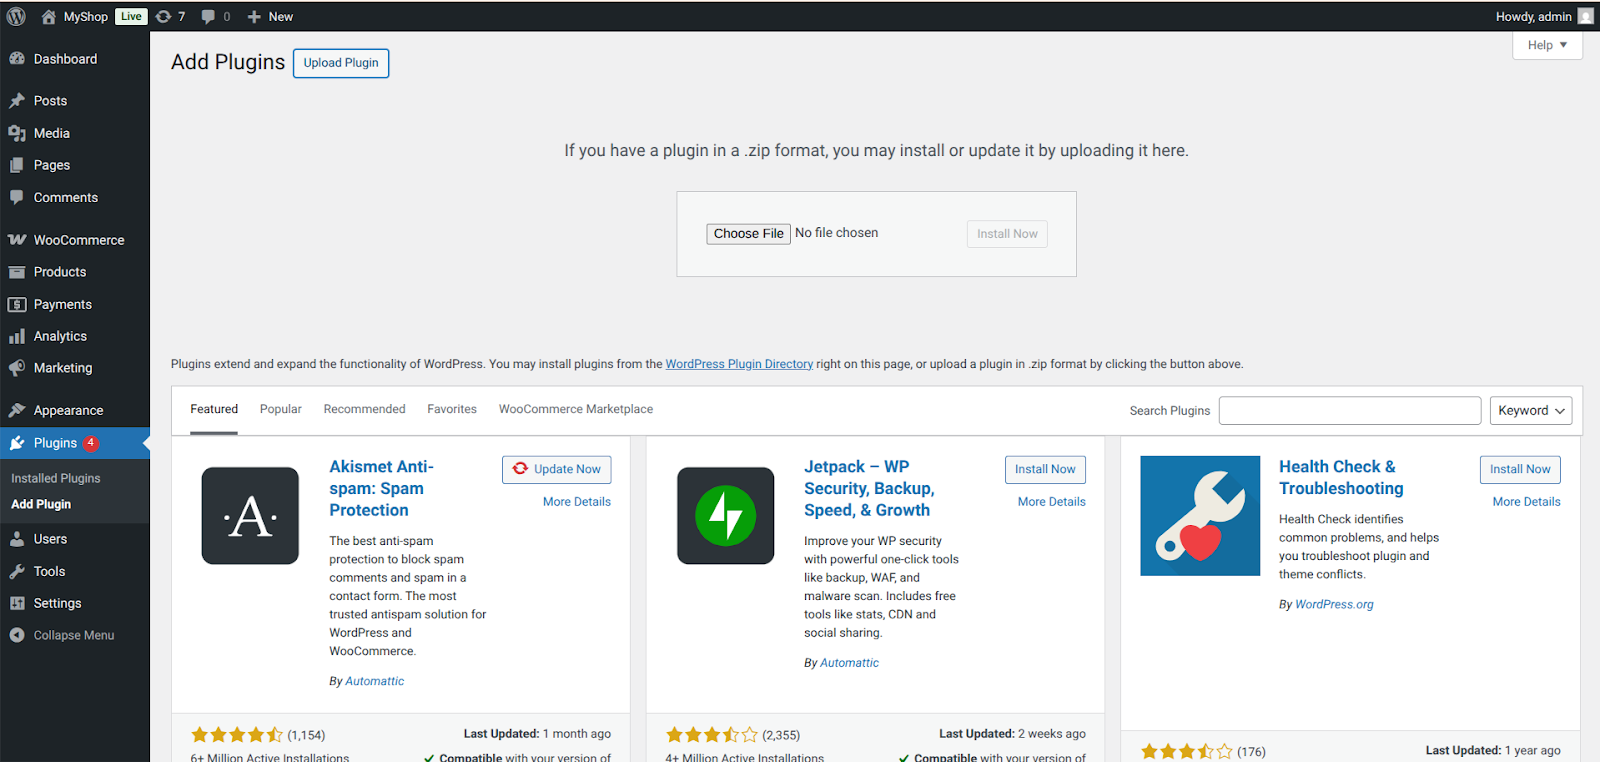
A button appears: Upload Plugin → Click → Choose File → Select jpsl-woocommerce-payment-gateway.zip
Step 3 — Install & Activate
Click Install Now, then Activate Plugin.
After activation:
A success message appears: “Plugin activated.”
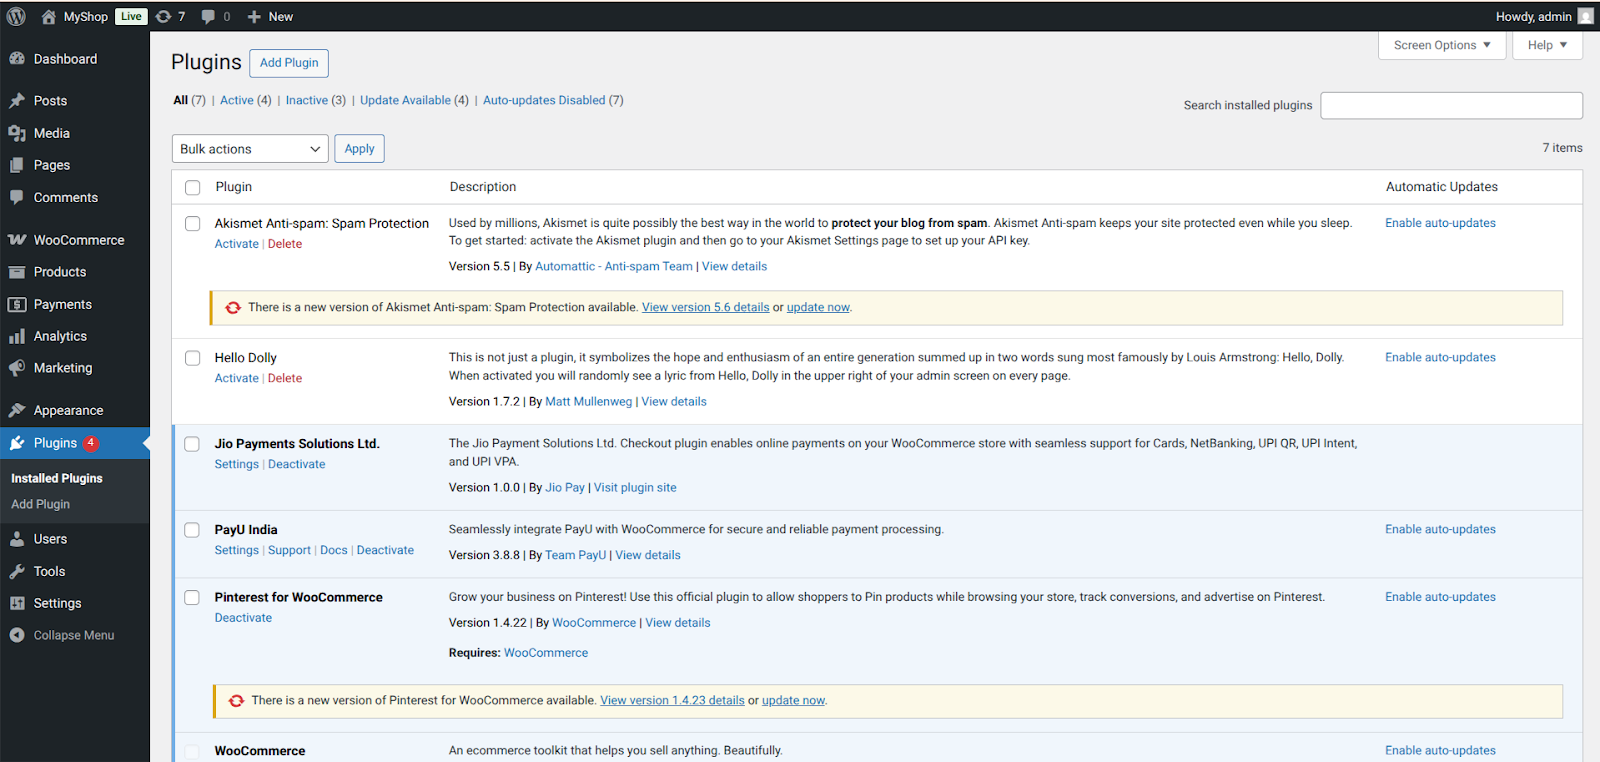
How the Plugin Configured Inside WooCommerce
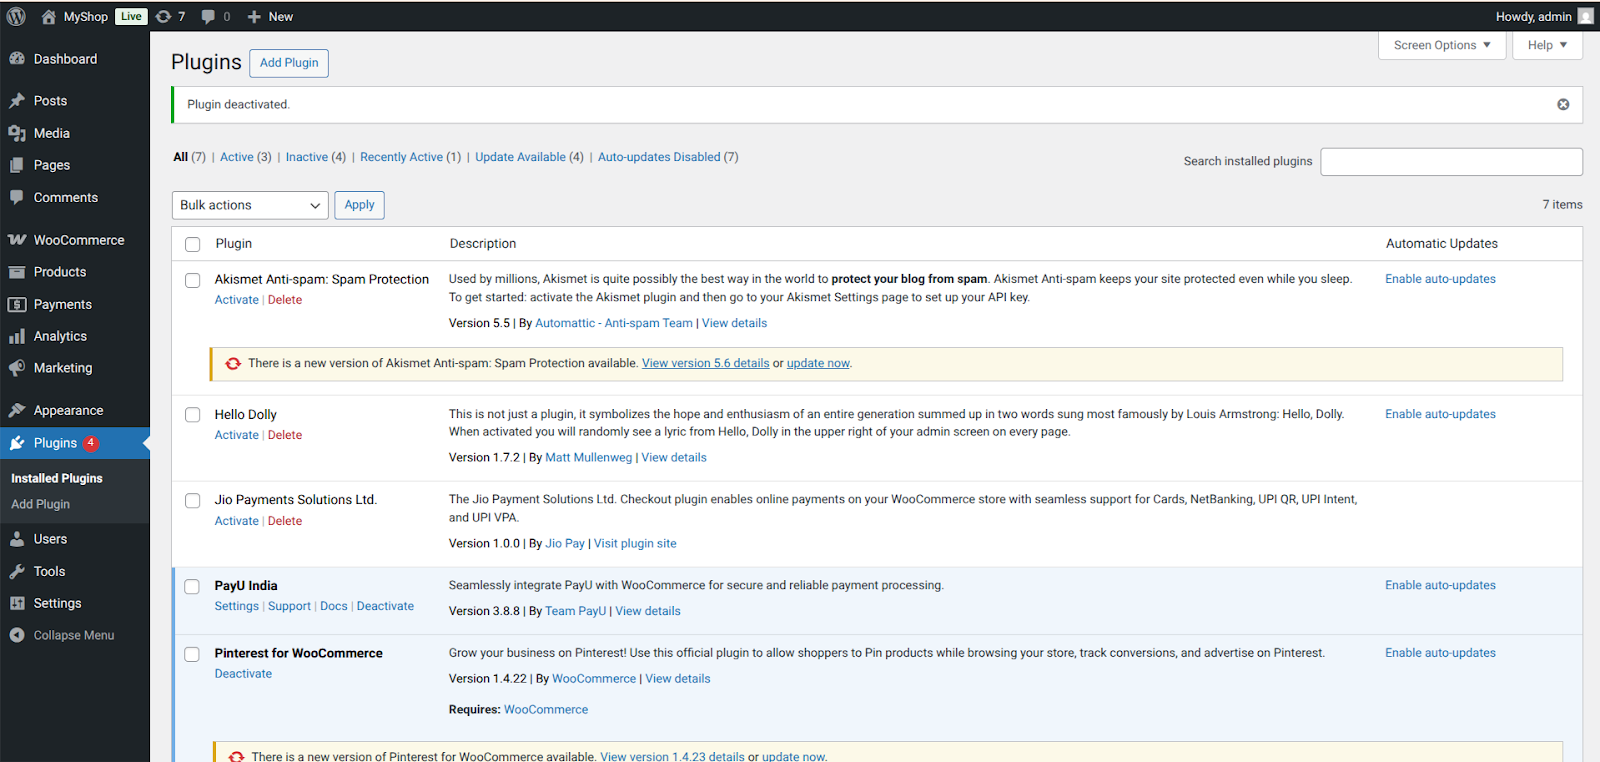
- Once activated, the merchant can find the plugin at:
WooCommerce → Settings → Payments
Screen Description:
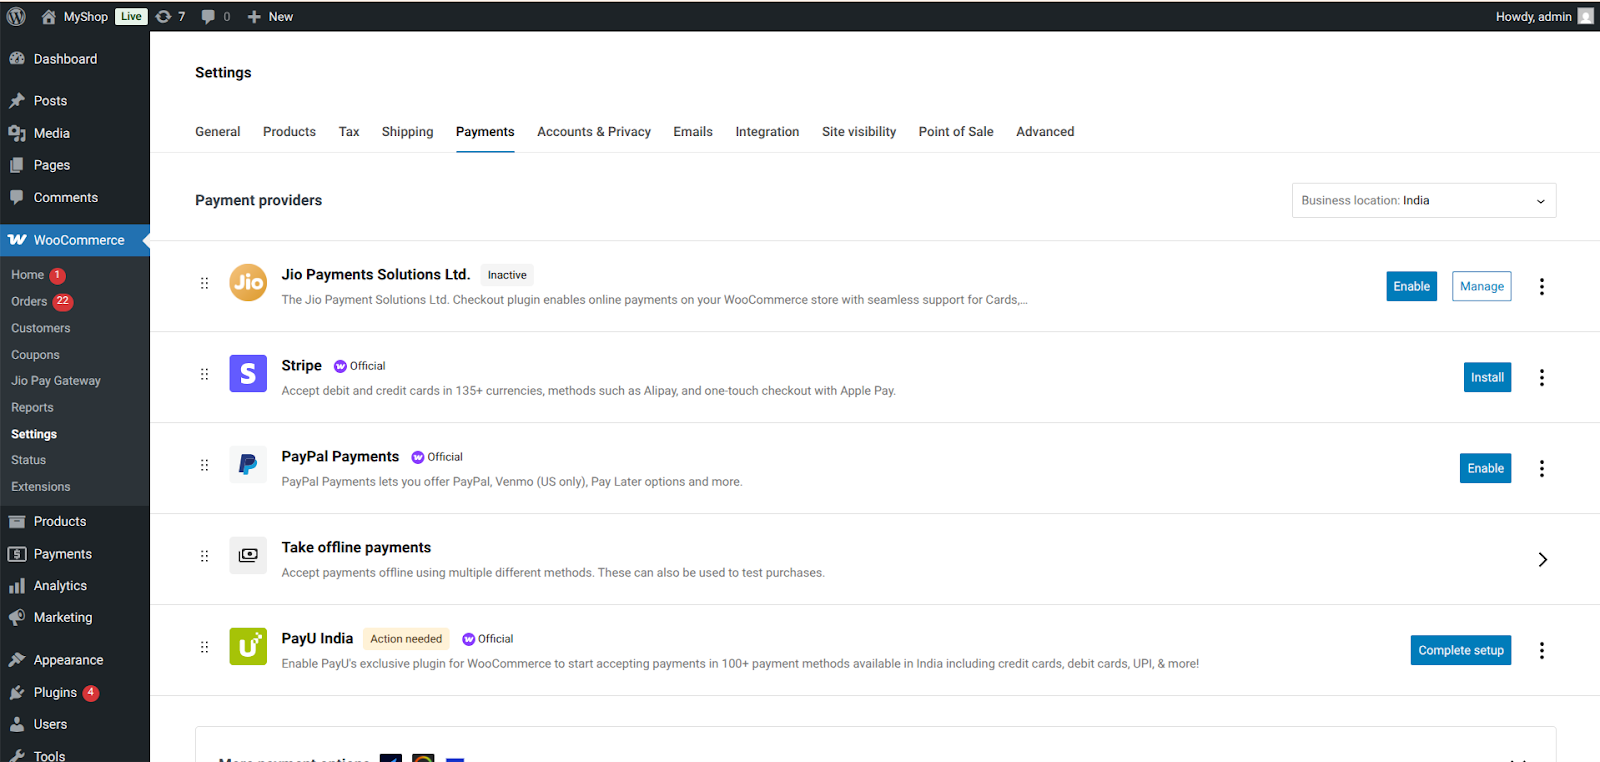
- The Payments list includes:
- Cash on Delivery
- Jio Payments Solution Ltd. (Cards, NetBanking, UPI) ← new entry added
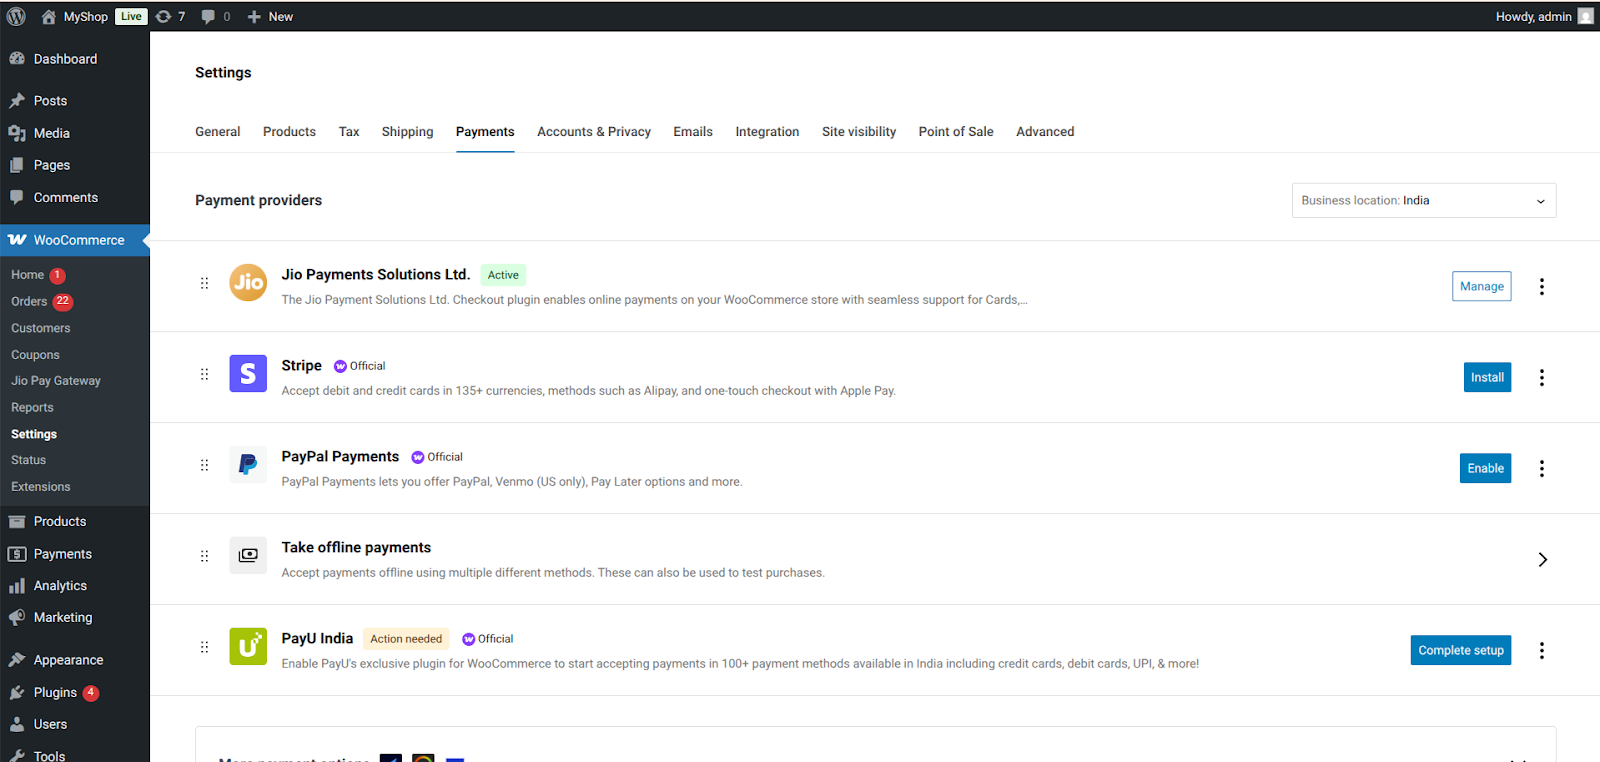
The merchant sees a button to Enable/Disable the Jio Payment Solution Ltd.
-
Click the “Enable” button to enable Jio Payments Solutions Ltd as payment gateway.
-
Click Manage.
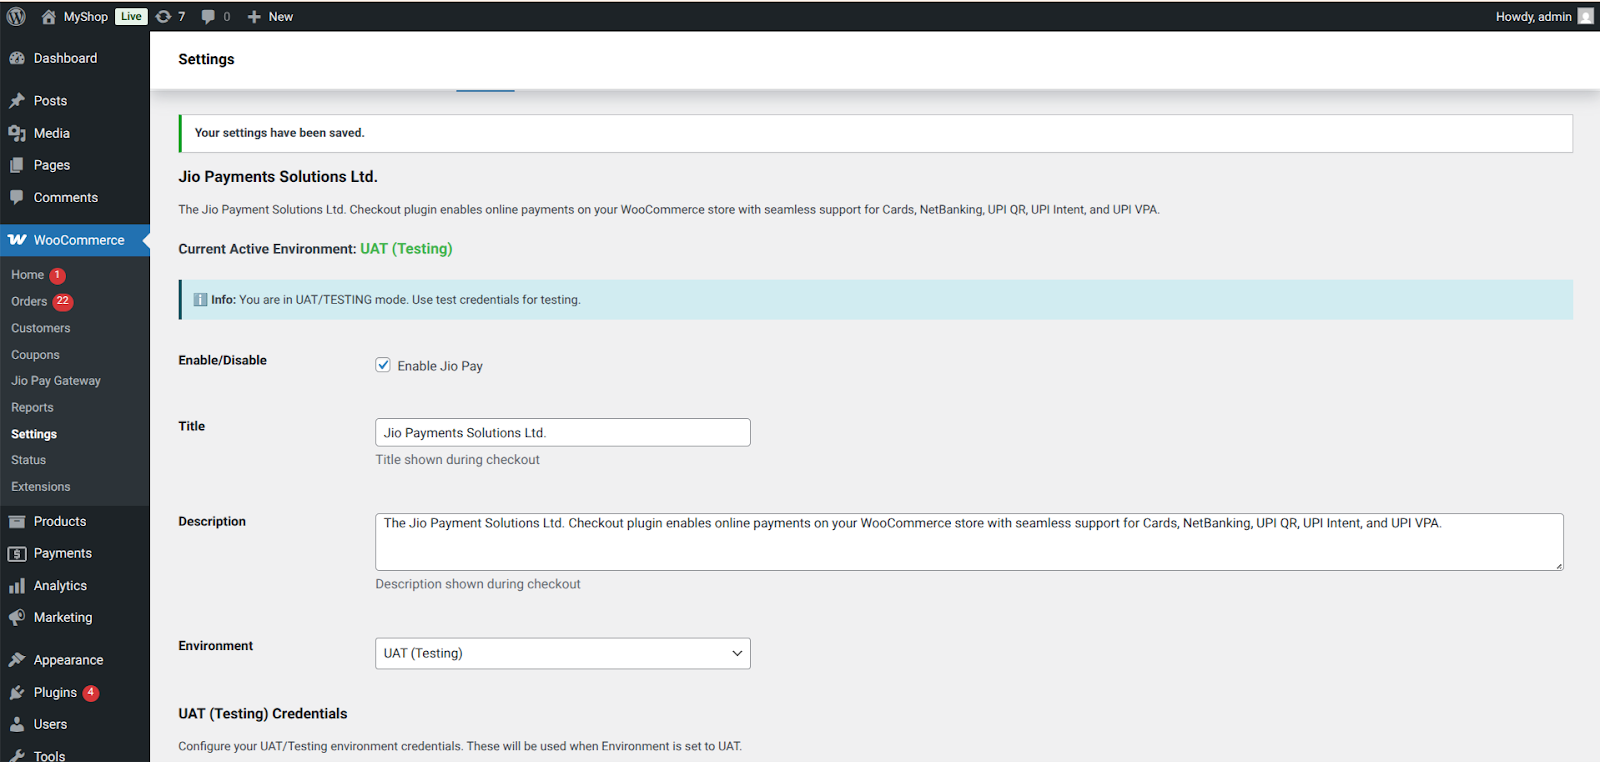
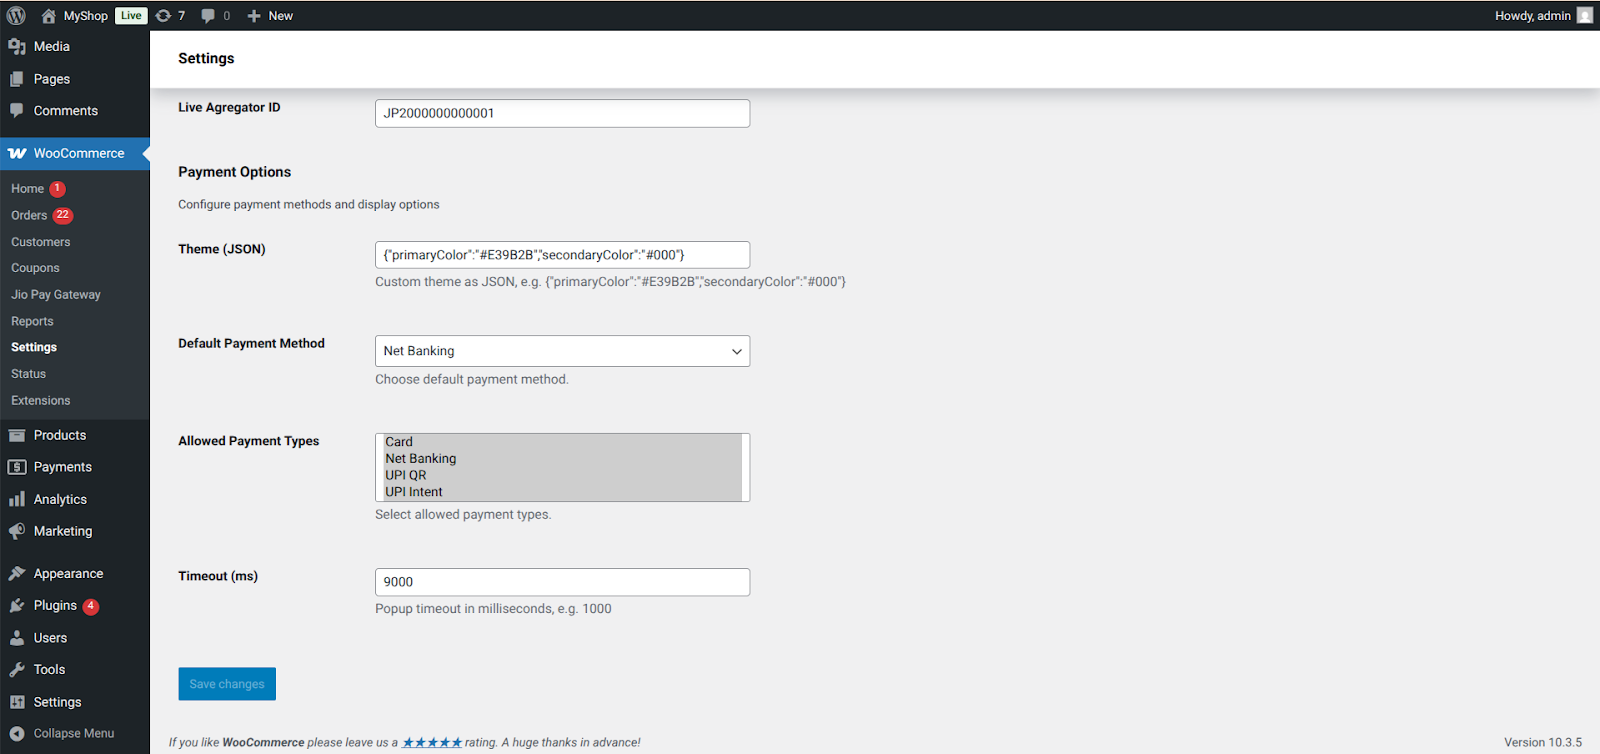
The Jio Payments Solution Ltd. payment page is displayed & the Configuration Screen Includes:
a. Enable or Disable Plugin Checkbox
b. Title of the Plugin and Description
c. Environment: Accordingly Credentials have to be provided.
- UAT (Testing)
- Live (Production)
d. UAT Testing Credentials: UAT Merchant ID, UAT Secret Key, UAT Aggregator ID
e. Live (Production) Credentials: Live Merchant ID, Live Secret Key, Live Aggregator ID
f. Theme (JASON): For the Look and Feel of the checkout page
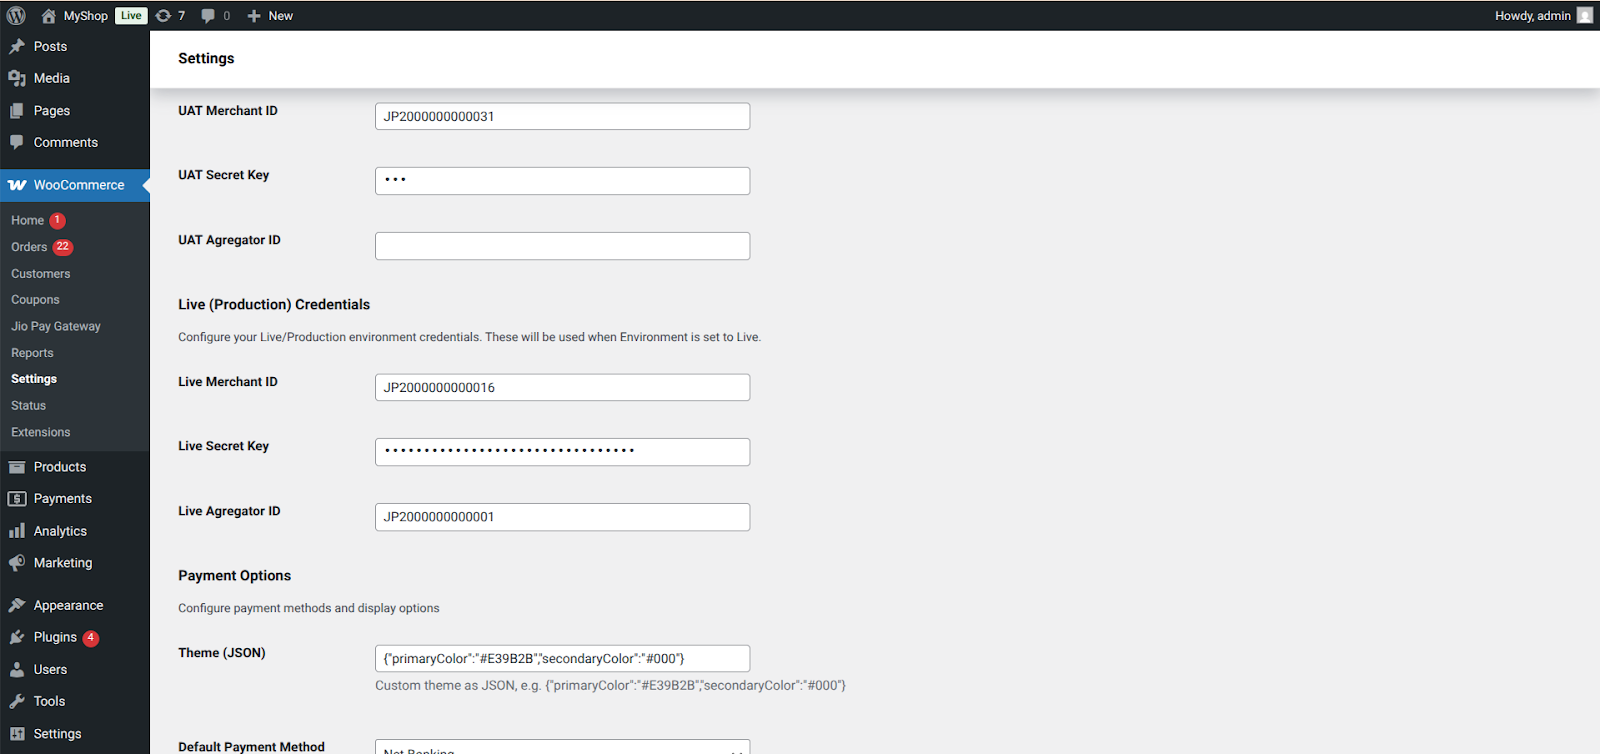
g. Default Payment Method Dropdown: To select the default payment method (Net Banking, Card, UPI QR, UPI Intent, UPI VPA)
h. Allowed Payment Types: Can select the Mode of payments which should be visible on the checkout page.
i. Timeout (ms): Session time for the checkout screen.
Payment Checkout Experience (Customer View)
When enabled, the customer sees multiple payment options on Checkout:
Cards
Visa, Mastercard, Rupay, Amex- Fast authorization and tokenized transactions using JPSL’s secure APIs.
NetBanking
Supports all major banks with instant settlement updates.
UPI QR
Auto-generates dynamic QR on checkout for seamless mobile payments.
UPI Intent
Opens UPI apps like Google Pay, PhonePe, Paytm in one tap.
UPI VPA / Collect
Customer enters VPA ID → receives collect request → completes payment.
Test Transaction Checklist (Mandatory)
Merchant must complete:
- Successful Payment- Order status should change to Processing.
- Failed Payment- Status should update to Failed.
- Cancelled Payment- Status should show Cancelled / Pending Payment.
Go-Live Steps
WooCommerce → Settings → Payments → Jio Payment Solution Ltd. → Manage
- Switch from Test Mode → Live Mode and configure all Production Details
- Replace test API keys with Live Keys
- Place ₹1–₹10 live test transaction
- Confirm WooCommerce order status updates correctly